No Photoshop, No Problem: The Quick-start Guide to GIMP
 Learn how to use one of the most recommended free alternatives to Photoshop to edit and manipulate your images to more artistic ones
Description of the Course on Skillshare
There is no doubt that Photoshop is among the go-to image editing and manipulation software for many. But, there are other excellent options to try out.
These are equally competitive, effective, affordable, and get the job done as superbly as Photoshop would. GIMP it is!
You might be using Photoshop but need to try out something different. Or, are probably looking for a cheaper image editing program. You will love GIMP whether you are a novice or an expert at image manipulation.
Rebecca will be your instructor as she journeys you through the fundamentals of GIMP. Well, she walks the talk. Rebecca is a sticker collector and has been practicing film photography for years.
If learning from an expert is what you wanted today, camp here! Oh! Funny enough, she still uses an old Asahi Pentax SLR that she bought at $10.
I know! It shocked me too. Her camera dates back to the 1960s and this means photography and editing can be limitless. She is a pro photographer, illustrator, and graphic designer among other things.
You can enrol in a physical school and study photography as a course. But, the editing and manipulation section will be brief. The rest will be left for you to find out and practice.
Why go through such stress when you can buy online courses targeting specific skills for cheap? More so, they take a short time to complete.
This is a concise 48-minute course with seven sections. Each section covers a specific topic. It makes the course flow well. There is no pressure to complete the course. Take it at your pace and feel free to retake sections that are proving difficult.
It is a beginner’s level course and most sections have no jargon. Also, if you are looking for a practical course, look no further! Rebecca made it a hands-on course.
With practice and adventure, you can maneuver the GIMP software and create anything you feel like. Most importantly, it is a FREE tool. Yes! You don’t have to pay to use it.
I know what we feel about free things. This one has versatile and powerful features that cut across all levels of skill. While there are other free open-source programs, GIMP is the most popular and straightforward to use.
Course Content and Overview
Just like you can learn how to knit, so would you how to edit a photo in GIMP. For the former, a crotchet and thread are essential. Rebecca doesn’t require you to have much. Only patience to learn and time to practice! The rest are basics.
She explains some of the commonest photo tasks and shows you how you can polish a photo from your camera selection.
Yes, if you have none, you can snap a good one and this should work equally well. GIMP is a haven of tools that you can’t exhaust in a day. Not even a pro editor can use all of them in one image.
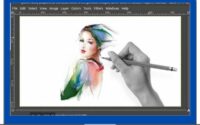
Since there is a plethora of them, you need time to learn each tool, what it does, and how to use it. Rebecca shows how you can use a couple of tools in the photo sample. The intention is to give it a more artistic spin.
If you are a newbie at photo editing, this GIMP tutorial will be a great place to start. It is one of the best Photoshop alternatives and is free!
The two share the majority of the tools which will be excellent if transitioning from using Photoshop to GIMP. Starters will learn where and how to download and install GIMP.
Next, you will dive into its interface and begin to customize it to suit your needs. Rebecca shows you how to locate tools. Finally, there is a section on how to open, save, and export files from GIMP.
As part of the introductory course, there are topics on sharpening images, rotation and skew, saturation, hue, and colour.
Newbies stay away from most image manipulation software because of how complicated they are to set up. This one is easy breezy.
The software is available for common operating systems including Windows and Mac. No worries about how to go about it. GIMP automatically detects your OS and gives the right link to use.
If you already downloaded the software before and never got a chance to use it, it probably needs an update. Simply update it or download its latest version.
Sometimes, the software auto-updates itself. You might be freaking after reading this. No! Here’s the good news: you won’t lose your settings.
NOTE: while still at the downloading stage, you might see an option to set up the 2.99.x. version. You can but it is a beta version and quite unstable. Most instructors don’t recommend it for daily use.
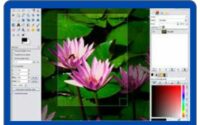
Once everything is set up, you will learn to get into the interface. It usually is in the single-window mode. Your interface will be divided into three panels- the toolbox, tool panels, and image window.
Rebecca shows the different methods of opening your files in GIMP. You can choose what works for you. If there is a moment that most freshers wait for is learning how to resize and crop their images.
Well, you might not have waited for too long, but here, you will dirty your hands with GIMP and master resizing and cropping images.
Once you can tackle the basics, you will need to save your new file. I know you are computer literate and are used to going to the Files icon and choosing Save, Save a copy, or Save As.
Well, that’s simple but not as it is in GIMP. Things are quite different on this side. But, not to worry. Rebecca is patient to teach you how to go about it.
There is more on importing your files. You will learn how to import new images in various formats. Well, this isn’t all. GIMP is a vast program that you can’t comb and master in a day.
This tutorial goes through the essentials a starter needs to know. But, there is more to the software than what you learn here.
All in all, your journey with the most recommended Photoshop alternative has just started. You can agree that getting started is pretty straightforward.
At least, not as complicated as what you read on blogs or watch on YouTube. Now that you can open, resize, sharpen, crop, and export images, your next intention should be to practice to hone your skills in these areas.
Later, you can advance to mastering GIMP layers and much more. Layers are crucial for all you work on in GIMP. Here, they work slightly differently from what you are used to in other image editing programs.
If you’ll need this check out more advanced courses on the site.
But wait, what about the instructor’s projects? To attempt or ignore? For practice and scaling to pro-level, attempting the projects will be great.
As part of the practice project, you will produce two versions of one image. One should be polished up and the other a well-remixed version using artistic and creative edits.
You can post your original photo and the two suggested versions for Rebecca to assess your progress. Also, you can share the tools you used to process your images and what you incorporated into the artistic version.
If you don’t have any great photos to use as your original, the instructor shares her sample photo thumbnails. They can be downloaded for use.
Also, the course comes with more downloadable resources to use as reference material during and after training. These explain more about the topics and should be easier to access than Googling or researching from other platforms.
Who is the Course for?
Anyone who is looking for free photo editing software to use.
Those interested in alternative programs to Photoshop.
New photo editors.
Illustrators
Digital creators
Influencers
Freelancers
Anyone who wants to learn how to manipulate and edit their photos.
What you will learn
- How to save and export your final images in GIMP
- Rotation and skewing
- Brightness and contrast
- Hue, colour, and saturation
- How to sharpen your images
- Creative cropping
Lessons
- An introduction to the course
- Ways of saving and exporting your photos
- How to rotate and skew images
- Brightness and contrast-how they impact the final results
- Hue, colour, and saturation
- Ways of sharpening your images
- Creative cropping
Course Requirements
A computer with an internet connection.
The latest version of GIMP downloaded on your computer.
Unedited photos-if you have none, there are sample photo thumbnails provided in the course
Willingness to learn and practice.
FAQ’s – Questions about the No Photoshop, No Problem: The Quick-start Guide to GIMP Course
Q) How do I install GIMP on my Windows computer?
A) Search up GIMP for Windows and click on the first link. This should download the file on your computer.
Double click on the .exe file then follow all the on-screen prompts. The time it takes to install will depend on your computer’s resources.
The installation should be complete. Find the GIMP app and create a desktop shortcut. This is for easy access.
Q) How do I alter the size of my GIMP panel on the interface?
A) You can resize both the right and left panels to your needs. Also, this is possible for individual sections or tabs that are within the GIMP panels.
To resize the primary panels, find the 3 dashed lines. These are on the inside of each panel. Click, then drag to the right or left. This should broaden or narrow the panels.
On some occasions, the panels could appear stacked. You can opt to make the bottom or top shorter or taller. To do this, click on the 3 dashed lines that are between them.
Q) How do I add more tool panels when customizing my GIMP panel?
A) The commonest inner panels in this program are the Tool Options and Layers Panel. There are extra panels with options for customizing tools too.
To add more panels, click on Windows then dockable dialogs. Choose a panel you need and open it. The new panel should auto-open in the primary right panel.
Q) Can I rename my images to help remember what I was working on?
A) You can add one dash then type your word of choice or anything to show it is a new yet different file. Also, you can write where you intend to use it e.g. Facebook, Instagram, or Pinterest.
To find it, you can search for it using the word you saved it with.
Q) What can I do if I need to resize a full-size image from my camera and it is too large?
A) Here, you need to resize and crop the image to use online. On the top menu, click on Image, then scale image. Activate the chain-link tab close to the height and width.
This should lock the image proportions to avoid getting stretched. Key in 1200px in the width as it is recommended. On your keyboard, press the TAB key.
GIMP auto-updates the height. For the X and Y resolutions, type 72 then click the OK button. This should resize your photo.
To crop the image, click on image then canvas size on the top menu. You can opt to retain the aspect ratio size. Ensure you link the dimensions.
So What Now?
There is every reason to learn how to use GIMP. From not spending anything to enjoying versatile tools similar to those in software like Photoshop, I think it is awesome to try it out.
Also, it is more straightforward to use from installation to photo manipulation and exportation. This is a starter course that any newbie will find useful.
If you’d like to learn more about this program, check out other GIMP courses on the site and enrol.
What Students are saying about the Course
I wish I knew about GIMP earlier, I would have saved a lot on paid software.
A much-needed course now that I am working on my school photography project.
This changed how I edit images for my Instagram page. Let’s just say I can see the numbers growing.

Learn to Use Canva the Beginner Design Solution
Why does my Gimp look Different to Other Users?
Thanks for sharing this GIMP guide for us, it’s great for understanding this program, I will test GIMP in the near future because it is good for me as a designer to have knowledge related to graphic design.
I will spread this post to my designer friends who study with me and I hope many of them will take it up too.
Finally again for letting me know about this FREE software.
No Problem Sean, Photoshop can be expensive even on a monthly subscription for some people so having a FREE option is good. It has a steep learning curve that’s why online tutorials like this one are great for picking up the essential tools to get you started.
I used to use GIMP a while back but haven’t for a while. I was amazed to see how much the platform had improved and thank you for this guide on how to use it, as there were a lot of things mentioned here that I didn’t know about, like resizing an image.
I have been using Canva for the past couple of years. How does GIMP compare with Canva?
GIMP has improved a lot recently and I use it daily in my image tasks. GIMP is a full image manipulation tool and can do loads more than Canva. However, it takes a lot more time to learn the tools within it. I actually use both as Canva has a built-in background remover tool that takes seconds compared to several minutes in GIMP.
It’s nice to know there is something out there that works as good as photoshop. I don’t have the program, as I got a new computer and the price was just a little steep for me. And I have not had the need for it anyway. But a program like photoshop would definitely be something to look into. I don’t think however, that I need a course.
I once gave Photoshop a try. But I ended up overwhelmed. All I wanted was to edit or even create some illustrations for my website. So, GIMP seems to be an easier program to use. I have always been a fan of vector images, so, GIMP will be helpful. Besides, I feel vector images are simpler than raster.
If all you need is a few simple graphics then GIMP has you covered. The fact it is FREE is a great incentive to get a copy and start learning how to use it.